Issuing Bank
DC Workflow
| DC Workflow | |
|---|---|
| Issue a DC | |
| Issue an amendment | |
| Approve / Reject a DC Cancel request | |
| Cancel a DC |
Presentation Workflow
General
| General | |
|---|---|
| Sending a P2P message | |
| Replying to a P2P message |
Details
Issue a DC
Maker
The maker receives an email notification when the applicant has submitted a DC application.
- On the left menu, click the
Import DCtab - In the summary listing, click on the DC application to be issued. The status will be
Application submitted - Maker to review. The DC details will be shown. - Review all details. If the applicant has allowed the issuing bank to directly make changes, then click on
Editto make the LC form fields editable. Update required details. - Enter the issuing bank's DC reference
- Optionally enter Additional conditions from the bank, and instructions to paying/accepting/negotiating bank.
- After completing the form, click on
Issue. - Review the form and click on
Submit. You will be redirected to the summary page. - The DC status will be
Application submitted - checker to review. - System sends a notification email to the checker.
Checker
- On the left menu, click the
Import DCtab - In the summary listing, click on the DC application to be issued. The status will be
Application submitted - checker to review. The DC details will be shown. - After completing the verification, click on
Verify. Confirm the action in the pop-up dialog box. - The DC status is changed to
Application submitted - approver to review - System sends a notification email to the approver.
Approver
- On the left menu, click the
Import DCtab - In the summary listing, click on the DC application to be issued. The status will be
Application submitted - approver to review. The DC details will be shown. - After completing the verification, click on
Approve. Confirm the action in the pop-up dialog box. - The DC status is changed to
Issued - requested confirmation party to review. If confirmation is not required in the DC, then it isIssued - nominated bank to review. - System sends a notification email to all parties in the DC.
Issue an Amendment
Maker
The users will receive a notification email when the applicant submits an amendment request.
- On the left menu, click the
Import DCtab - In the summary listing, click on the DC application to be amended. The amendment status will be
Amendment requested - Maker to review. The DC amendment tab. You can see the Overview of previous amendment requests as well as the original DC. Click on the draft version to be issued. You can see a summary of the changes. Click onView. - Review all changes (highlighted for easy reference).
- Click on
Issue. ClickReturnto send the amendment request back to the applicant. - After completing the form, click on
Preview. - Review the form and click on
Submit. You will be redirected to the summary page. - The DC status will be
Amendment requested - checker to review. - System sends a notification email to the checker.
Checker
- On the left menu, click the
Import DCtab - In the summary listing, click on the DC application to be issued. The Amendment status will be
Amendment requested - checker to review. The DC Amendments tab will be shown. Click on the draft version to be verified. Review the summary of the changes and click onViewto see full DC details. - After completing the verification, click on
Verify. Confirm the action in the pop-up dialog box. - The DC status is changed to
Application submitted - approver to review - System sends a notification email to the approver.
Approver
- On the left menu, click the
Import DCtab - In the summary listing, click on the DC application to be issued. The Amendment status will be
Amendment requested - approver to review. The DC Amendments tab will be shown. Click on the draft version to be verified. Review the summary of the changes and click onViewto see full DC details. - After completing the verification, click on
Approve. Confirm the action in the pop-up dialog box. - The DC status is changed to
Amended - requested confirmation party to review. If confirmation is not required in the DC, then the amendment is sent to the nominated/advising bank for review.Note: If the DC previously contained confirmation, but was removed or party was changed during this amendment, then it is still sent to the previous confirmation party for approval.
- System sends a notification email to the next party.
Approve / Reject a DC Cancel request
When the applicant creates a DC cancel request (using P2P message), a notification email is sent to all parties.
Maker
- On the left menu, click the
Import DCtab - In the summary listing, click on the DC to be cancelled.
- Click on the P2P message section under the DC
- You will see the DC cancel request. Click on it to see the details.
- Click on
Approve Requestto approve cancellation. Confirm the action in the pop-up dialog box. - A notification email will be sent to the checker.
Checker
- On the left menu, click the
Import DCtab - In the summary listing, click on the DC to be cancelled.
- Click on the P2P message section under the DC
- You will see the DC cancel request. Click on it to see the details.
- Click on
Verifyto verify cancellation. Confirm the action in the pop-up dialog box. - A notification email will be sent to the approver.
Approver
- On the left menu, click the
Import DCtab - In the summary listing, click on the DC to be cancelled.
- Click on the P2P message section under the DC
- You will see the DC cancel request. Click on it to see the details.
- Click on
Verifyto verify cancellation. Confirm the action in the pop-up dialog box.
Cancel a DC
Once all parties approve the P2P cancellation request sent by the applicant, the issuing bank can proceed to Cancel the DC.
Maker
- On the left menu, click the
Import DCtab - In the summary listing, click on the DC to be cancelled.
- In the DC form, the hint will indicate that the DC can be cancelled (see screenshot below)
- Click on the
Cancelbutton. Confirm the action in the pop-up dialog box.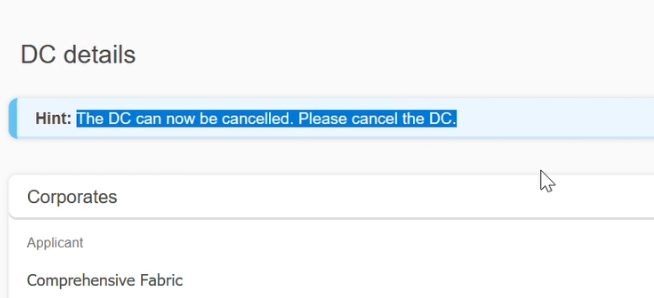
Checker
- On the left menu, click the
Import DCtab - In the summary listing, click on the DC to be cancelled.
- In the DC form, click on the
Verifybutton to complete checking.Declineto send it back to the maker. - Confirm the action in the pop-up dialog box.
Approver
- On the left menu, click the
Import DCtab - In the summary listing, click on the DC to be cancelled.
- In the DC form, click on the
Approvebutton to complete checking.Declineto send it back to the maker. - Confirm the action in the pop-up dialog box.
- The DC is now cancelled. In the summary listing for all parties, the DC status will show as
Cancelled.
View and return a presentation
If the bank needs to return the presented documents to the presenter (for example, if the documents are discrepant), it is possible on Contour -
Maker
- On the left pane, click the
Import DCtab - In the summary listing, click on the DC with the presentation. The Presentation status of this record will be
Bank review - Maker to review - You will see the DC and all presentations (DP1, DP2 etc) on the left pane. Click on the DP to be reviewed. You will see the Overview, cover letter from the presenter and all documents presented by the beneficiary. Click on each heading to review the presentation.
- To return it to the previous party, click on
Return - Click on
Previewto preview the submission. Click onSubmitto complete the maker process. You will redirect to the summary listing page, presentation status updated asBank review - checker to review.
Checker
- On the left pane, click the
Export DCtab - In the summary listing, click on the DC with the presentation. The Presentation status of this record will be
Bank review - Maker to review - You will see the DC and all presentations (DP1, DP2 etc) on the left pane. Click on the DP to be reviewed. You will see all documents including your bank's cover letter. Click on each heading to review the presentation.
- Click on
Verifyif everything is fine. Click onDeclineto return it to the maker. Add optional comments in the confirmation pop-up box. - You will redirect to the summary listing page, presentation status updated as
Bank review - approver to review.
Approver
- On the left pane, click the
Import DCtab - In the summary listing, click on the DC with the presentation. The Presentation status of this record will be
Bank review - Maker to review - You will see the DC and all presentations (DP1, DP2 etc) on the left pane. Click on the DP to be reviewed. You will see all documents including your bank's cover letter. Click on each heading to review the presentation.
- Click on
Approveif everything is fine. Click onDeclineto return it to the maker. Add optional comments in the confirmation pop-up box. - You will redirect to the summary listing page, presentation status updated as
Bank review - nominated bank to review. The DP has now been returned. An email notification is sent to the nominated bank.
Accept a presentation
If there are no discrepancies upon review, or if the Applicant has waived the discrepancies then the issuing bank may accept the presentation. Once a presentation is accepted, it cannot be returned.
Maker
- On the left pane, click the
Import DCtab - In the summary listing, click on the DC with the presentation. The Presentation status of this record will be
Bank review - Maker to review - You will see the DC and all presentations (DP1, DP2 etc) on the left pane. Click on the DP to be reviewed. You will see the Overview, cover letter from the presenter and all documents presented by the beneficiary. Click on each heading to review the presentation.
- To accept the presentation, click on
Accept. - Click on
Previewto preview the submission. Click onSubmitto complete the maker process. You will redirect to the summary listing page, presentation status updated asBank review - checker to review.
Checker
- On the left pane, click the
Import DCtab - In the summary listing, click on the DC with the presentation. The Presentation status of this record will be
Bank review - Checker to review - You will see the DC and all presentations (DP1, DP2 etc) on the left pane. Click on the DP to be verified. You will see all documents including your bank's cover letter. Click on each heading to review the presentation.
- Click on
Verifyif everything is fine. Click onDeclineto return it to the maker. Add optional comments in the confirmation pop-up box. - You will redirect to the summary listing page, presentation status updated as
Bank review - approver to review.
Approver
- On the left pane, click the
Import DCtab - In the summary listing, click on the DC with the presentation. The Presentation status of this record will be
Bank review - Approver to review - You will see the DC and all presentations (DP1, DP2 etc) on the left pane. Click on the DP to be reviewed. You will see all documents including your bank's cover letter. Click on each heading to review the presentation.
- Click on
Approveif everything is fine. Click onDeclineto return it to the maker. Add optional comments in the confirmation pop-up box. - You will redirect to the summary listing page, presentation status updated as
Accepted. The DP has now been accepted by the issuing bank. An email notification is sent to all parties.
Note: The documents are not yet release to the applicant. For this you need to set the payment date and release the documents.
Refer to the tolerance and amounts shown in the summary section of DC Overview page.
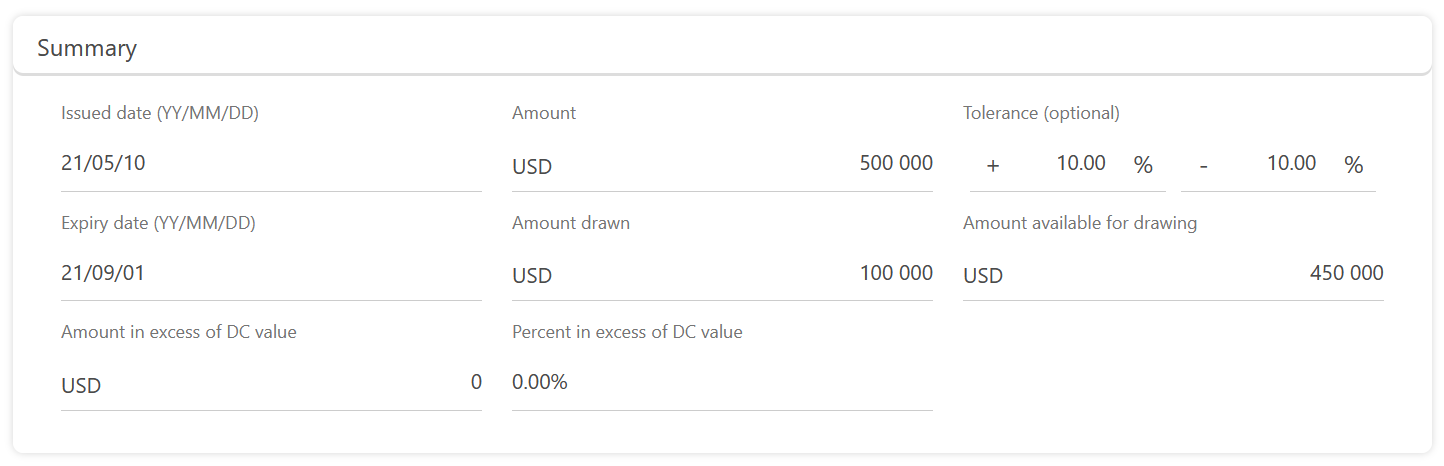
- The total amount available is calculated as the upper limit of the DC tolerance percentage.
- The
Amount available for drawingis updated for all parties only after the issuing bank reviews and accepts a presentation.
Set a payment due date and release documents
Once a DP has been accepted (either with or without discrepancies) the issuing bank may release documents to the applicant.
Maker
- Click on the
Import DCtab. In the summary listing, click on the DC with the relevant presentation. - You will see the DC and all presentations (DP1, DP2 etc) on the left pane. Click on the DP to be released (status should be
Accepted). - In the Summary section, enter the payment due date.
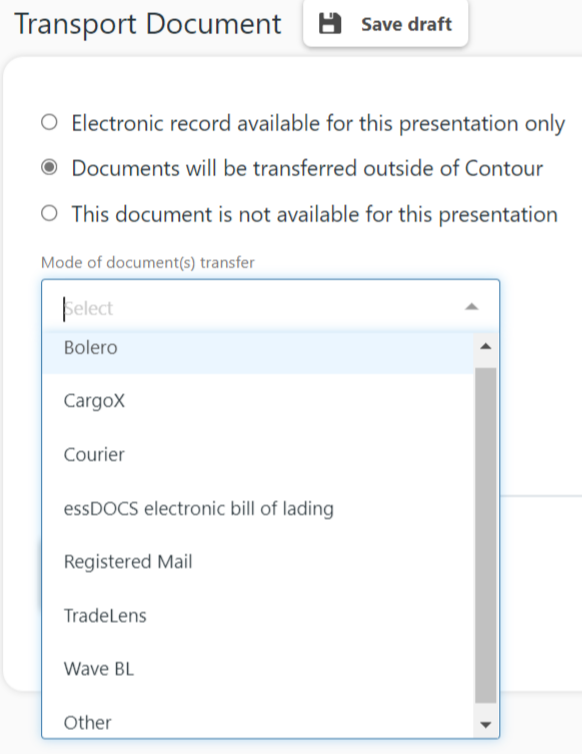
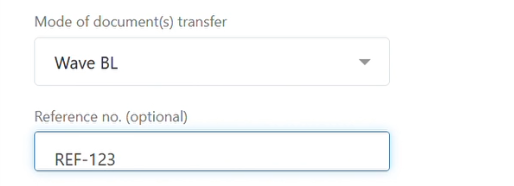
- At the bottom of the page, click on
Set payment due date and release documents. If you do not want to release documents, click onSet payment due date. - If documents are being transferred outside Contour, you may change the mode of transfer, and related references at this time.
- Review the action and click on
Submit. - Notification will be sent to the checker to review.
Checker
- On the left pane, click the
Import DCtab - In the summary listing, click on the DC with the presentation. The Presentation status of this record will be
Bank review - Checker to review - You will see the DC and all presentations (DP1, DP2 etc) on the left pane. Click on the DP to be verified. In the summary you will see the payment due date.
- Click on
Verifyif everything is fine. Click onDeclineto return it to the maker. Add optional comments in the confirmation pop-up box. - You will redirect to the summary listing page, presentation status updated as
Accepted - approver to review.
Approver
- On the left pane, click the
Import DCtab - In the summary listing, click on the DC with the presentation. The Presentation status of this record will be
Bank review - Approver to review - You will see the DC and all presentations (DP1, DP2 etc) on the left pane. Click on the DP to be verified. In the summary you will see the payment due date.
- Click on
Approveif everything is fine. Click onDeclineto return it to the maker. Add optional comments in the confirmation pop-up box. - You will redirect to the summary listing page, presentation status is
Accepted. The documents have been now released to the applicant.
View Bill Settlement instructions
Once the applicant sends bill settlement instructions can view the same on Contour. Further actions such as processing the settlement, or loan request would be outside Contour. However the bank may continue communicating with the customer using P2P messages.
All users
The makers will receive a notification when a P2P message is received by the organisation.
- Click on the
Import DCtab (if you are an applicant or issuing bank). Otherwise click onExport DCtab. - In the summary listing, find and click on the DC in which you want to reply for a P2P message.
- Under the relevant presentation (DP1, DP2 etc) in the left pane, click on
P2P message. - The bill settlement instructions sent by the applicant will be visible in the list of messages. If you want to reply to a message related to an amendment or a DP, go to the corresponding P2P message section.
Send an Advise of Discharge
Maker
- Click on the
Import DCtab. - In the summary listing, find and click on the DC for which you want to send an advise of discharge.
- Under the DC, find the relevant presentation (DP) in the left pane and click on
P2P message.
- You will see a list of previous messages(if any), click on the 'draft' icon.
- Select the type of message as
Advise of Discharge. - Type the recipient names. You can select any party involved in the DC transaction.
- Select the date of advice of payment/acceptance/negotiation, amount, and any additional information to the receiver
- If you want to attach any files, use the
Attachbutton.Only PDF with max 7MB is allowed as attachments.
- Click on
Send. - The Checker will be notified via email.
Checker
Refer to checker actions in Sending a P2P message
Approver
Refer to approver actions in Sending a P2P message
Send an Advise of Reimbursement or Payment
Maker
- Click on the
Import DCtab. - In the summary listing, find and click on the DC for which you want to send an advise of reimbursement.
- Under the DC, find the relevant presentation (DP) in the left pane and click on
P2P message. - You will see a list of previous messages(if any), click on the 'draft' icon.
- Select the type of message as
Advise of Reimbursement or Payment. - Type the recipient names. You can select any party involved in the DC transaction.
- Enter the amount claimed, amount reimbursed/paid and payment date. In case the message is being sent to a correspondent bank, use the sender's/receiver's correspondent bank fields.
- Enter any further instructions in the
Additional Informationfield. - If you want to attach any files, use the
Attachbutton.Only PDF with max 7MB is allowed as attachments.
- Click on
Send. - The Checker will be notified via email.
Checker
Refer to checker actions in Sending a P2P message
Approver
Refer to approver actions in Sending a P2P message
Send a Notice of discrepancy
Maker
- Click on the
Import DCtab. - In the summary listing, find and click on the DC for which you want to send a Notice of discrepancy.
- Under the DC, find the relevant presentation (DP) in the left pane and click on
P2P message. - You will see a list of previous messages(if any), click on the 'draft' icon.
- Select the type of message as
Notice of discrepancy. - Type the recipient names. You can select any party involved in the DC transaction.
- Enter the
Principal amountandNotice of discrepanciesfields. - Enter any applicable charges and account with bank if required. Further instructions can also be input in the
Sender to receiver informationfield. - If you want to attach any files, use the
Attachbutton.Only PDF with max 7MB is allowed as attachments.
- Click on
Send. - The Checker will be notified via email.
Checker
Refer to checker actions in Sending a P2P message
Approver
Refer to approver actions in Sending a P2P message
Send an Authorisation to pay, accept or negotiate
Maker
- Click on the
Import DCtab. - In the summary listing, find and click on the DC for which you want to send a Notice of discrepancy.
- Under the DC, find the relevant presentation (DP) in the left pane and click on
P2P message. - You will see a list of previous messages(if any), click on the 'draft' icon.
- Select the type of message as
Authorisation to pay, accept or negotiate. - Type the recipient names. You can select any party involved in the DC transaction.
- Select the appropriate identifier of the message in the
Further identificationfield. - Enter the amount claimed, applicable charges and payment date. In case the message is being sent to a correspondent bank, use the sender's/receiver's correspondent bank fields.
- Enter any further instructions in the
Additional Informationfield. - If you want to attach any files, use the
Attachbutton.Only PDF with max 7MB is allowed as attachments.
- Click on
Send. - The Checker will be notified via email.
Checker
Refer to checker actions in Sending a P2P message
Approver
Refer to approver actions in Sending a P2P message
Send an Advise of refusal
Maker
- Click on the
Import DCtab. - In the summary listing, find and click on the DC for which you want to send a Notice of discrepancy.
- Under the DC, find the relevant presentation (DP) in the left pane and click on
P2P message. - You will see a list of previous messages(if any), click on the 'draft' icon.
- Select the type of message as
Advise of refusal. - Type the recipient names. You can select any party involved in the DC transaction.
- Enter the references of the Sender and Presenting bank as well as the utilisation date.
- Enter the reasons for refusal in the
Discrepanciesfield and appropriate disposal of the documents presented in theDisposal of documentsfield. - Enter the utilisation amount, any applicable charges and account with bank if required.
- If you want to attach any files, use the
Attachbutton.Only PDF with max 7MB is allowed as attachments.
- Click on
Send. - The Checker will be notified via email.
Checker
Refer to checker actions in Sending a P2P message