Beneficiary Actions
DC Workflow
Presentation Workflow
| Presentation Workflow | |
|---|---|
| Save a DP as draft and submit a Demand Presentation |
Details
Endorse or return a draft DC application
Before sending the DC application to the issuing bank, the applicant may send the Draft copy to the beneficiary. The Beneficiary may either endorse the application, return it or make further changes before returning it to the applicant.
Maker
The maker receives a notification email when the applicant sends a draft.
- On the left menu, click the
Export DCtab. - In the summary listing, find and click on the DC be reviewed. The status will be
Draft text - maker to review. - Check the details of the DC. If everything is OK, then click on
Endorse.( If you want to make further edits, then click on Edit. The DC form will become editable. If you do not want to endorse or edit, then simply click onReturn) - Preview will show you the details once more. Click
Submit. - A notification email is sent to the checker.
Checker
- On the left menu, click the
Export DCtab. - In the summary listing, find and click on the DC be reviewed. The status will be
Draft text - checker to review. - Check the details of the DC. If everything is OK, then click on
Verify, (ClickDeclineto return it to the maker) - A notification email is sent to the approver.
Approver
- On the left menu, click the
Export DCtab. - In the summary listing, find and click on the DC be reviewed. The status will be
Draft text - approver to review. - Check the details of the DC. If everything is OK, then click on
Approve, (ClickDeclineto return it to the maker) - A notification email is sent to the applicant.
View an advised DC
The beneficiary is able to see the DC details as soon as it is applied by the applicant to the issuing bank, or earlier if the applicant has sent it to the beneficiary for co-drafting.
Once the DC is advised, the DC status changes to Issued and Advised. The beneficiary users get a notification email.
All users
- On the left menu, click on
Export DC. - In the summary listing, the latest DC will be visible first. Otherwise search the DC using the Contour ref in the Search box.
- Click on the DC record in the list.
- You will be able to see the full DC details.
Request for an amendment
Maker
- On the left menu, click the
Export DCtab - In the summary listing, click on the DC to be amended.
- Make the necessary data amendments on the form. Updated fields will be highlighted for easy review.
- Click on
Send to Applicant. A preview page is shown. - Review the changes on the preview page and click on
Submit. The request is submitted to the checker and you return to the summary page. - The amendment status is shown as
Draft in progress - checker to review. - A notification email is sent to the checker.
Checker
- On the left menu, click the
Export DCtab - In the summary listing, the DC will be highlighted to indicate an action for the checker. Click on the DC.
- The Amendments tab will be shown under the DC on the left pane. The right pane will show an overview of all amendment versions on the DC. The newly created draft version will be shown in the list, highlighted to indicate action to be taken by the user.
- Click on the draft version to be verified. You will see a summary of changes in this version. Click on
Viewlink to open the full details. - Review the updates and click on
Verifyto complete the checking process. (Click onDeclineto return the draft to the maker) - Confirm the action in the pop-up dialog box. You will be redirected to the summary page. The amendment status will show
Draft in progress - approver to review - A notification email is sent to the approver.
Approver
- On the left menu, click the
Export DCtab - In the summary listing, the DC will be highlighted to indicate an action for the checker. Click on the DC.
- The Amendments tab will be shown under the DC on the left pane. The right pane will show an overview of all amendment versions on the DC. The newly created draft version will be shown in the list, highlighted to indicate action to be taken by the user.
- Click on the draft version to be verified. You will see a summary of changes in this version. Click on
Viewlink to open the full details. - Review the updates and click on
Approveto complete the checking process. (Click onDeclineto return the draft to the maker) - Confirm the action in the pop-up dialog box. You will be redirected to the summary page. The amendment status will show
Draft in progress - Applicant to review - A notification email is sent to the Applicant.
Endorse or Return a draft DC amendment
Maker
- On the left menu, click the
Export DCtab - In the summary listing, click on the DC to be amended. You will see the amendments tab, with the draft version highlighted.
- Make the necessary data amendments on the form. Updated fields will be highlighted for easy review.
- Click on
Endorse. A preview page is shown. You can also click onEditto make further changes. - Review the changes on the preview page and click on
Submit. The request is submitted to the checker and you return to the summary page. - The amendment status is shown as
Draft in progress - checker to review. - A notification email is sent to the checker.
Checker
- On the left menu, click the
Export DCtab - In the summary listing, click on the DC to be amended. You will see the amendments tab, with the draft version highlighted.
- Review the endorsed amendment. Updated fields will be highlighted for easy review.
- Review the updates and click on
Verifyto complete the checking process. (Click onDeclineto return the draft to the maker) - Confirm the action in the pop-up dialog box. You will be redirected to the summary page. The amendment status will show
Draft in progress - approver to review - A notification email is sent to the approver.
Approver
- On the left menu, click the
Export DCtab - In the summary listing, the DC will be highlighted to indicate an action for the checker. Click on the DC.
- The Amendments tab will be shown under the DC on the left pane. The right pane will show an overview of all amendment versions on the DC. The newly created draft version will be shown in the list, highlighted to indicate action to be taken by the user.
- Click on the draft version to be approved. You will see a summary of changes in this version. Click on
Viewlink to open the full details. - Review the updates and click on
Approveto complete the checking process. (Click onDeclineto return the draft to the maker) - Confirm the action in the pop-up dialog box. You will be redirected to the summary page. The amendment status will show
Draft text endorsed - Applicant to review - A notification email is sent to the Applicant.
Request to add a confirmation
If the confirmation instruction is May Add, and the DC was issued without a confirmation, then the beneficiary can at any time request the confirming party to add a confirmation.
Maker
- On the left menu, click the
Export DCtab. - Select the DC to which confirmation is to be added.
- Scroll to the bottom, and click on
Request Confirmation - Preview the action and click on
Submit. - A notification email will be sent to the checker.
Checker
- On the left menu, click the
Export DCtab. - Select the DC to which confirmation is to be added.
- Scroll to the bottom, and click on
Verify - Confirm your action in the pop-up dialog box. Add optional comments to the approver.
- A notification email will be sent to the approver.
Approver
- On the left menu, click the
Export DCtab. - Select the DC to which confirmation is to be added.
- Scroll to the bottom, and click on
Approve - Confirm your action in the pop-up dialog box. Add optional comments for internal reference.
- The request is sent to the confirming party along with a notification email.
Accept / Reject an amendment
Maker
- On the left menu, click the
Export DCtab - In the summary listing, click on the DC to be amended. You will see the amendments tab, with the new amendment version highlighted.
- Review the changes. Updated fields will be highlighted for easy review.
- Click on
Accept. A preview page is shown. You may alsoRejectthe amendment if you do not want to accept. - Review the changes on the preview page and click on
Submit. The request is submitted to the checker and you return to the summary page. - The amendment status is shown as
Amended - checker to review. - A notification email is sent to the checker.
Checker
- On the left menu, click the
Export DCtab - In the summary listing, click on the DC to be amended. You will see the amendments tab, with the draft version highlighted.
- Review the endorsed amendment. Updated fields will be highlighted for easy review.
- Review the updates and click on
Verifyto complete the checking process. (Click onDeclineto return the draft to the maker) - Confirm the action in the pop-up dialog box. You will be redirected to the summary page. The amendment status will show
Amended - approver to review - A notification email is sent to the approver.
Approver
- On the left menu, click the
Export DCtab - In the summary listing, the DC will be highlighted to indicate an action for the checker. Click on the DC.
- The Amendments tab will be shown under the DC on the left pane. The right pane will show an overview of all amendment versions on the DC. The newly created draft version will be shown in the list, highlighted to indicate action to be taken by the user.
- Click on the draft version to be approved. You will see a summary of changes in this version. Click on
Viewlink to open the full details. - Review the updates and click on
Approveto complete the checking process. (Click onDeclineto return the draft to the maker) - Confirm the action in the pop-up dialog box. You will be redirected to the summary page. The amendment status will show
Amended. - A notification email is sent to all parties indicating that the amendment was accepted.
Approve / Reject a DC Cancel request
When the applicant creates a DC cancel request (using P2P message), a notification email is sent to all parties.
Maker
- On the left menu, click the
Export DCtab - In the summary listing, click on the DC to be cancelled.
- Click on the P2P message section under the DC
- You will see the DC cancel request. Click on it to see the details.
- Click on
Approve Requestto approve cancellation. Confirm the action in the pop-up dialog box. - A notification email will be sent to the checker.
Checker
- On the left menu, click the
Export DCtab - In the summary listing, click on the DC to be cancelled.
- Click on the P2P message section under the DC
- You will see the DC cancel request. Click on it to see the details.
- Click on
Verifyto verify cancellation. Confirm the action in the pop-up dialog box. - A notification email will be sent to the approver.
Approver
- On the left menu, click the
Export DCtab - In the summary listing, click on the DC to be cancelled.
- Click on the P2P message section under the DC
- You will see the DC cancel request. Click on it to see the details.
- Click on
Verifyto verify cancellation. Confirm the action in the pop-up dialog box.
If all parties have approved, then it is indicated by the system under the P2P message. Now the issuing bank can proceed to cancel the DC.
Save a draft and submitting a Demand Presentation
Once a DC has been issued and advised, the beneficiary can present documents against the DC.
Maker
- On the left menu, click the
Export DCtab. - In the summary listing, click on the DC under which you want to make a presentation.
- Click on
DC formoption. Scroll to the bottom of the DC form and click on thePresentbutton. - A new tab (DP1) is created under the DC, on the left pane. Click on the tab and enter the
Overviewsection - Select your document source as Contour.
- Select the bank to which the documents are to be presented (Present To). Optionally select another bank if you wish to present through any other bank on Contour. Click on
Save and Next - Enter details in the
Cover letter by Beneficiary. You can give additional instructions, account details for charges or for proceeds, and other details. Click onSave and Next. - The left pane will show the list of all documents that are required for a valid presentation, as per the issued DC.
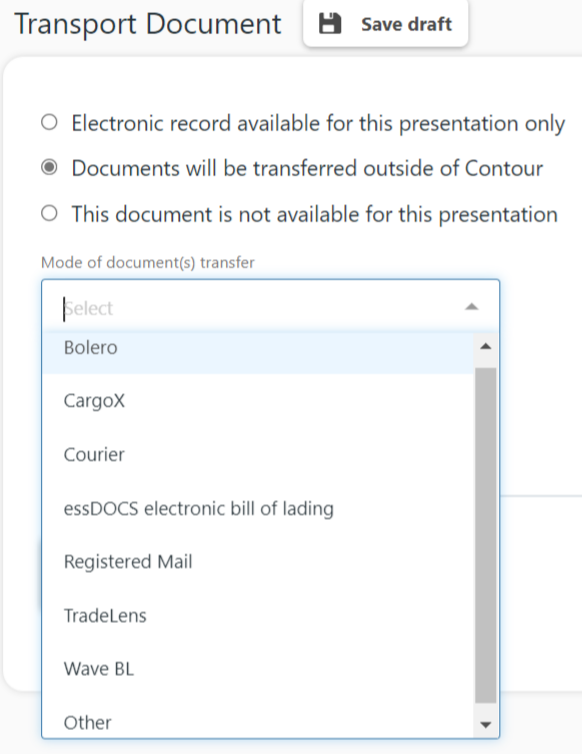
- In the Invoice tab, upload your invoice information. If the invoice is being transferred outside of Contour, then click on
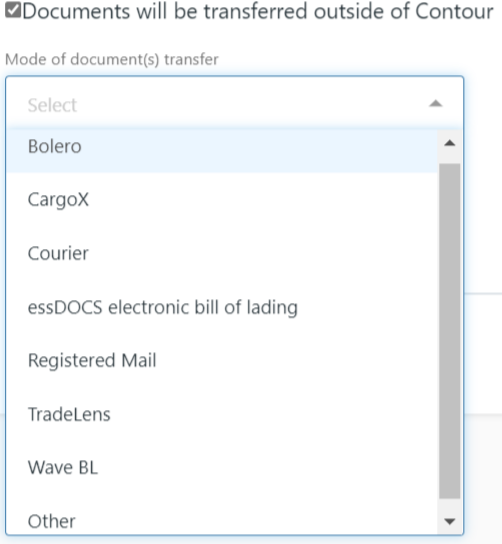
Documents will be transferred outside of Contourand specify the mode of transfer. You may select one of the several third party e-BL platforms, courier, registered post, or mention the mode of transfer of your choice. You may also leave the Invoice tab empty if the document is not required for the presentation. Click onSave and Next.
- Upload all other documents as specified in the DC, on each page.
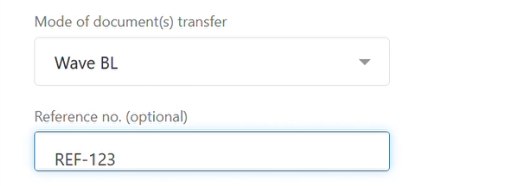
- If the document is being transferred outside of Contour, specify the mode of transfer. You may select one of the several third party e-BL platforms, courier, registered post, or mention the mode of transfer of your choice.
- Enter the reference number of the document, as given on the external platform. This will help the nominated bank to find the document on the external platform. If you are sending via courier or registered mail, then mention the tracking id.
-
Incase, during presentation, any of the required documents under the DC are not applicable to this presentation, specify by selecting the option
This document is not available for this presentationand proceed with uploading the other available documents.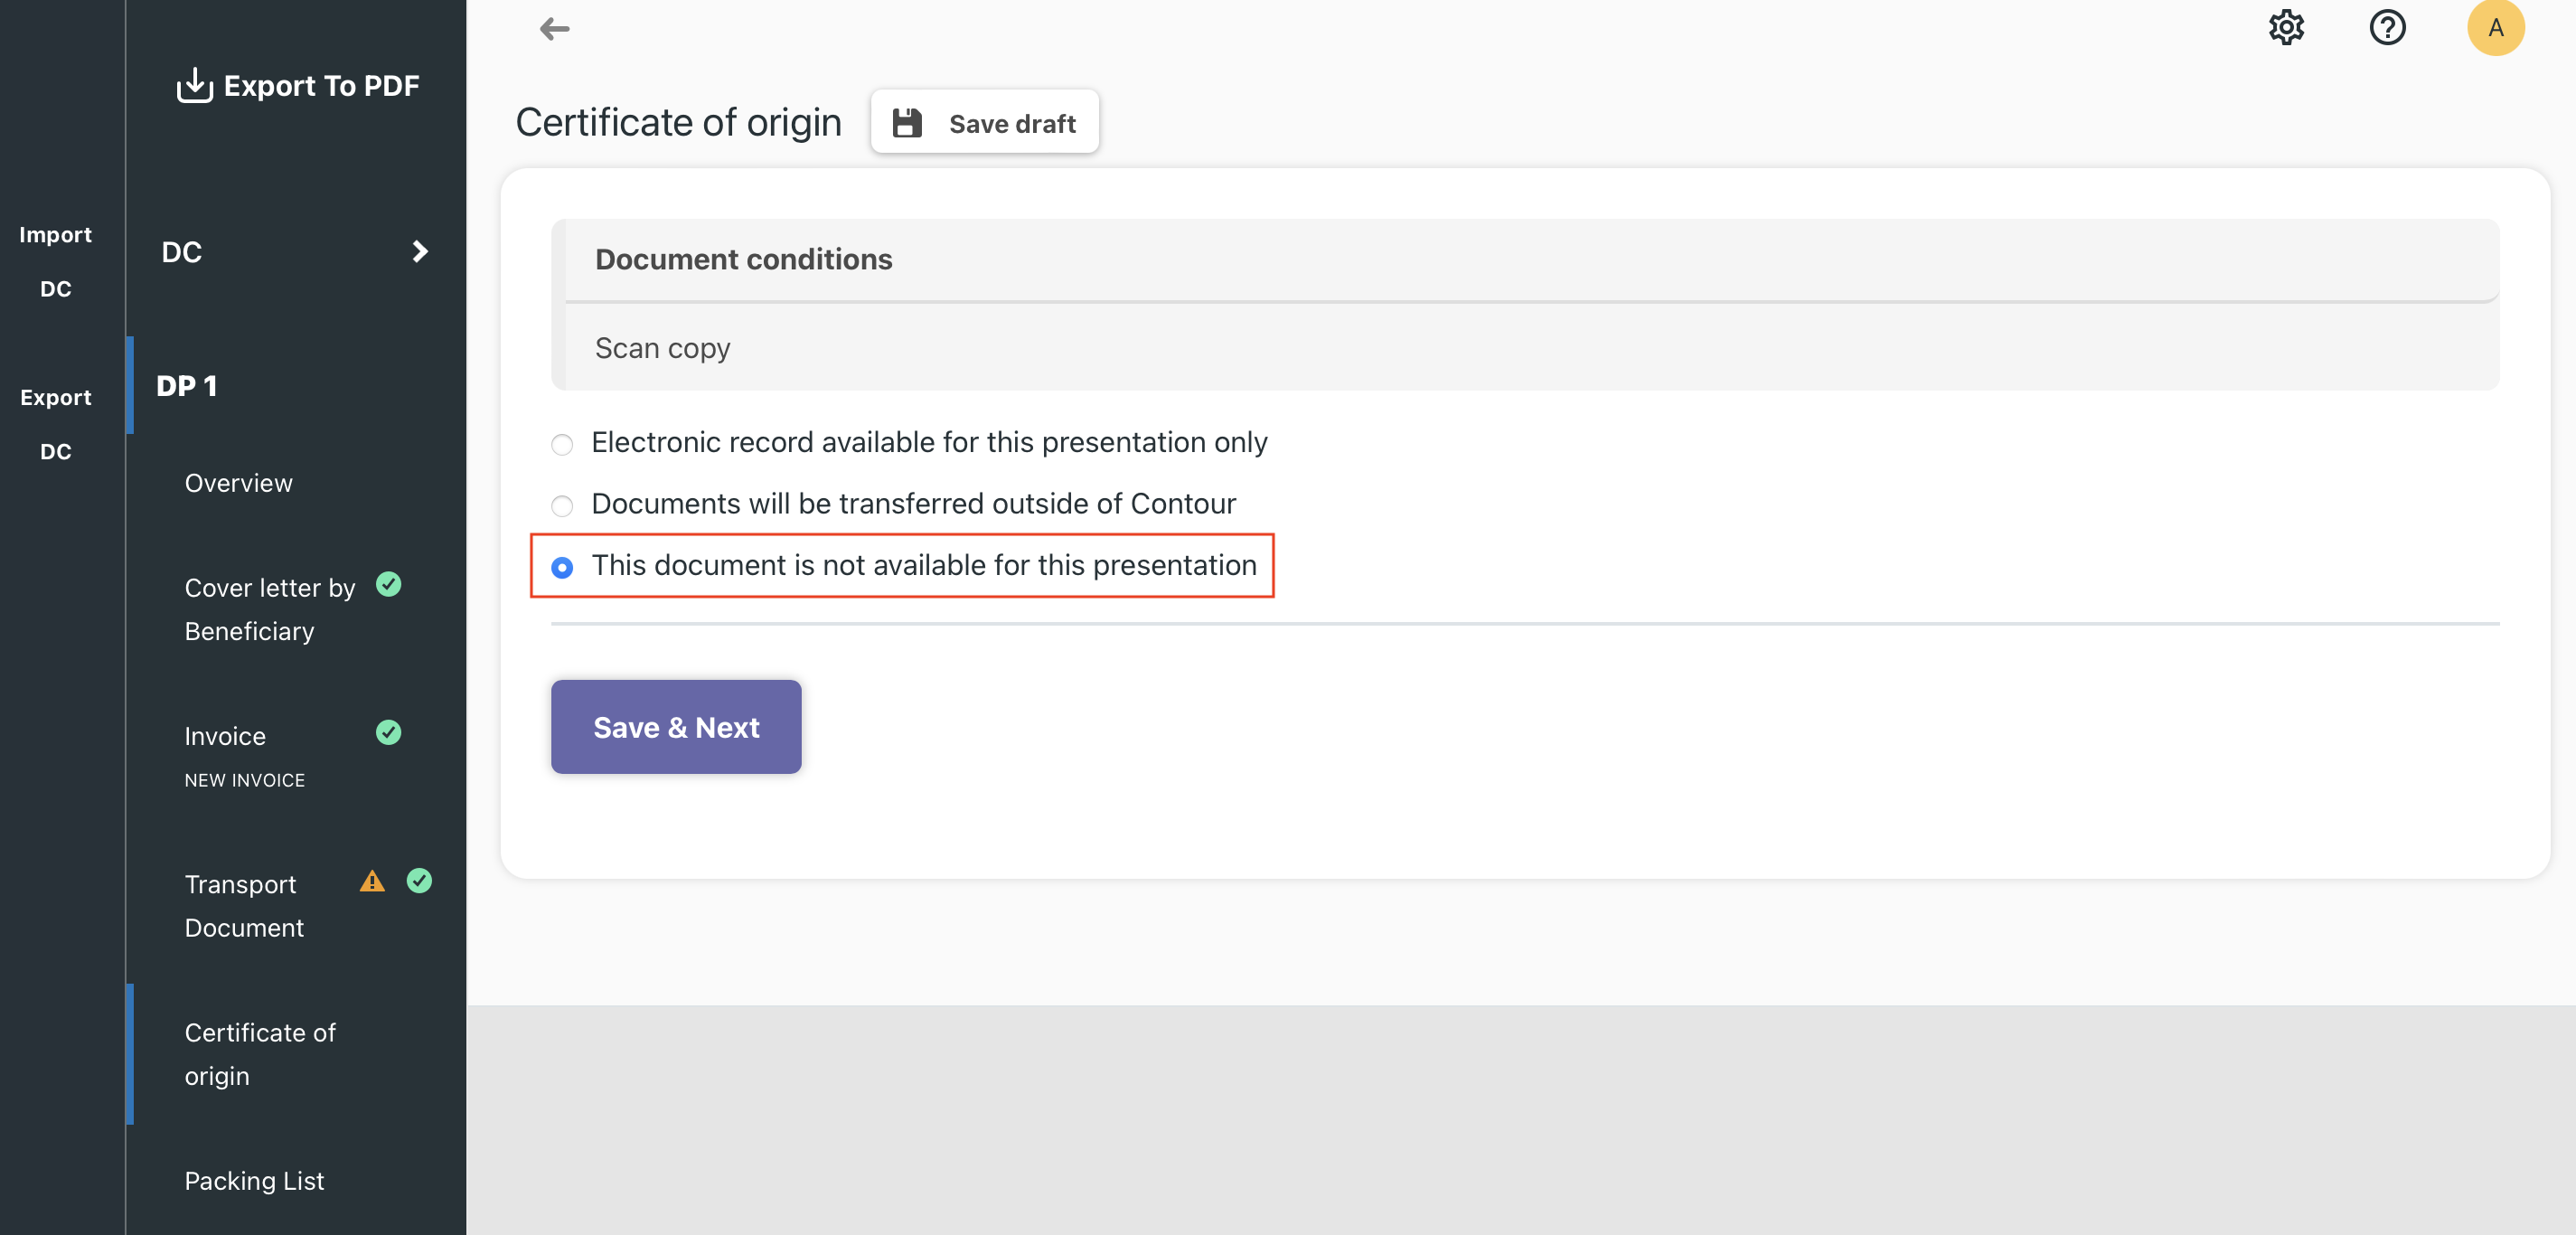
-
Click on
Save Draftbutton to save your work as a draft. The presentation will be saved, and is available to resume working at a later time. This is not yet submitted to the checker.
Submission of the DP
- Once you return to the draft DP, complete the application (if it was incomplete).
- Provide a certification of completeness, at the bottom of the DP. Or indicate that the certificate of completeness will be sent along with mailed documents.
- Click on
Submit presentation. - Preview the DP and click on
Submit. - The status of the Presentation will show
Draft in progress - checker to review.
Checker
- On the left menu, click the
Export DCtab. - In the summary listing, click on the DC under which you want to verify a presentation.
- In the left pane, click on the presentation to be verified (DP1, DP2 etc). Review all documents and the cover letter.
- Click on
Verifyto complete verification. Add comments in the pop-up dialog box. - The status of the Presentation will show
Draft in progress - approver to review.
Approver
- On the left menu, click the
Export DCtab. - In the summary listing, click on the DC under which you want to verify a presentation.
- In the left pane, click on the presentation to be verified (DP1, DP2 etc). Review all documents and the cover letter.
- Click on
Approveto complete verification. Add comments in the pop-up dialog box. - The presentation status in summary page will show
Bank reviewIf confirmation is required by the DC, then the presentation is first sent to the confirming bank.